Waterproofing for wet area (under tiling)
Common issues and queries you can face
Wet areas under tiling
This application is for any wet area under tiling which will be in direct contact and reputable using of water such as kitchen, bathroom, and others in residential or commercial buildings in either on a new building or for repairing old ones. In both cases, a waterproofing system needs to be applied under tilling (the wet area) in order to protect the concrete and prevent any water leakage.
Step by step solution
weber solution
-
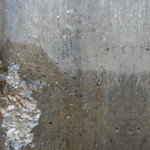
Substrate preparation
Remove dust, oil and any remainders by using grinders and fresh water only; all substrate must be sound and clean.
JOINTS
In joints between floor and walls (corner) mostly the area where water can be leaked – in order to reinforce this weak area, weber jointseal PU has to be used and applied, at least two days before waterproofing product (Polyurethane waterproofing system) or the non-shrinking grout weberep 331 TX (Cementitious or Acrylic waterproofing system)
PIPES AND FITTING
In all above-mentioned wet areas pipes would be found extended and penetrated from floor or downside of walls, drainage holes and valves or fitting are also present, all the area around these holes should be treated with weber jointseal PU Groove of 5 mm wide and 25 mm depth around all any penetration of pipes, draining and fittings is to be made in order to be filled with weber jointseal PU. If any cracks are present, they can be treated the same way(Polyurethane waterproofing system )or to use in the same way the weberdry 150 BLC (Cementitious or Acrylic waterproofing system)
-
Product solution
WATERPROOFING
Different systems are recommended:(refer to the PDF version)
- Flexible Cementitious Waterproofing using weberdry 110 FX*
- Acrylic Waterproofing using weberdry gum/weber band
- Polyurethane Waterproofing using weberdry prime 310 PU/weberdry 360 PU/weberdry 390 PU
-
Complementary system
TILING
The wet area is ready to receive the final step of this system. The tiles are to be fixed by using webercol plus or webercol flex as follows:
- Using an electric mixer with low rotation speed (< 300 rpm), mix weber.col plus with fresh water until a uniform lump-free paste is obtained.
- Apply webercol plus/webercol flex evenly on the substrate. Use a notched trowel to have the required thickness. Apply the tiles on the substrate and press them firmly, while making sure that the paste does not slip from the tile sides.
- webercol plus/webercol flex can also be applied on the back of tiles to ensure full adhesion on the entire surface.
GROUTING
After the fixation of tiles, all the area must be cleaned with fresh water and kept untouched for 24 hours in order to allow the tiling to be set, then all the tiles joints should be filled with weberjoint deco or weberjoint perfect. Apply the product with a rubber spatula into the joints by filling all the gaps. Remove surplus grout with a damp sponge. Use the product after mixing, within its pot life. When the grout is dry, clean the tiles with a dry cloth.

Necessary products for this solution


Find all our products near you in more than 2000 outlets